Home GymValet Introduction Features Benefits and Hygiene GymValet Eilte Installation Photo Gallery Customer Feedback Frequently Asked Questions Shop Online About Us Contact Us Industry Links Sitemap

Visit my Blog - DrBruceSays.com Visit us on Facebook


Installation Instructions Buy the Gymvalet Now!
 
The GymValet is designed for a simple installation. Follow the procedure below to attach it to almost any piece of gym equipment without tools. If you do not find the information you are looking for, or have additional questions, please contact us and we will be happy to assist you.
Download Instructions PDF (772K)
 
Typical Installation

They say a picture is worth 1,000 words. If that's the case, then a video is worth 1,000,000 words. The short video (right) shows Dr. Sherman installing a GymValet on a piece of selectorized strength equipment. Note that the full installation takes less than one minute.

Please take note of the handy tips he offers to optimize the installation process and, therefore, maximize the lifespan and functionality of your GymValet!
 
Four Important Installation Tips...

Whenever you install or reposition a GymValet be sure to:
1) Tighten and retighten the straps to create even & strong strap tension.  When adjusting the straps make sure that the D-ring (buckle) is touching the frame of the equipment.  The D-ring should not be touching the attachment fitting or "suspend" in the space between the fitting and the frame!
2) Listen for the "click" as the holder cup attaches to the attachment fitting.
3) "Snap" the hook ring on to the holder cup through its 360 degree circumference.  Run your fingers around the cup-hook ring "joint" circumference to ensure that there are no attachment "gaps!"
4) If you have too much extra strap-length, after GymValet insatllation...no problem.  Use a pair of scissors to cut the strap to the desired length.
 
Installation Example: Woodway Curve Treadmill

Watch Dr. Sherman (right) install a GymValet on a Woodway Curve treadmill. When installing a GymValet on a (relatively) small diameter frame tube that does not have a vertical (straight up and down) orientation be sure to: 1) Pull both straps as tight as possible (see strap tightening details in Tip #1 above), and 2) make sure the attachment fitting is perpendicular to the ground or, in this case, the treadmill deck. By following these two simple tips you will limit the chance for the GymValet to slip/rotate on the frame and ensure that the GymValet is positioned in an upright orientation.
 
Step by step installation. No tools necessary!
(Click pictures to enlarge)
1. Loop one attachment strap around equipment, rubber side facing in. 2. Slide attachment fitting under strap and pull end of strap tightly back on to itself. Press hook and loop firmly together.

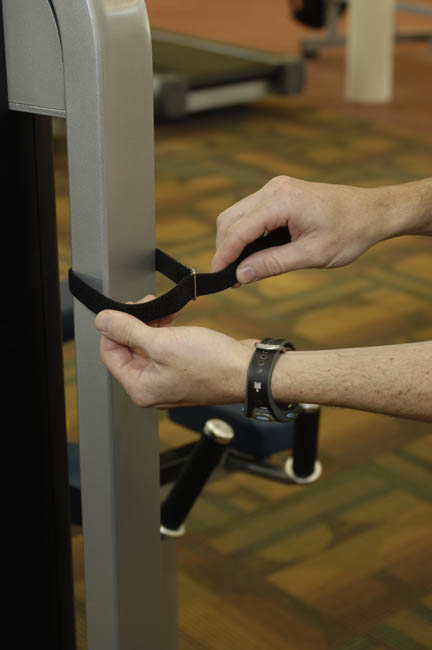
3. Attach other strap around bottom of attachment fitting.

For optimum non-slip attachment: A) Position the straps' D-rings fully over the equipment frame's surface, and B) Pull the strap ends parallel to the direction of the equipment's frame.

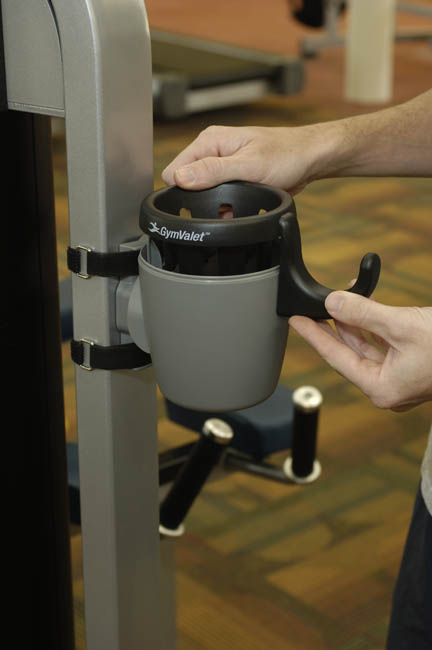
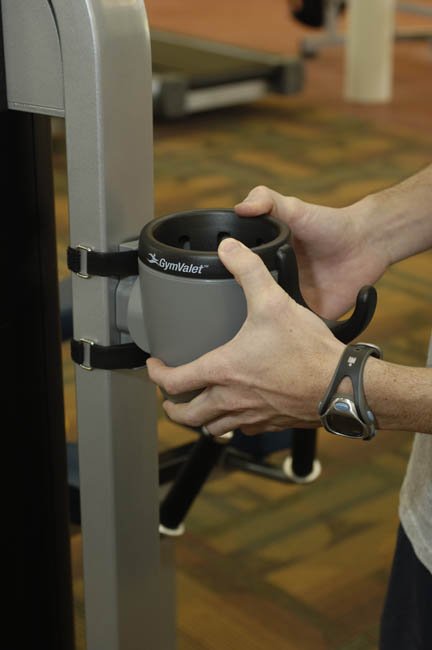
If necessary, fine tune the tightness of both straps to ensure the attachment does not move.

4. Hold cup vertical and slide it over the attachment fitting until cup is secure. 5. Place hook ring over cup (hook can be positioned for optimal towel access). 6. Push together until hook ring snaps securely in place around the full circumference of the hook ring.  To guarantee proper attachment , run your finger around the circumference of the ring-cup attachment.  You should feel no gaps or spaces.
 
Preventive Care and Maintenance

 
On a regular basis give the GymValet a once-over.  
1) Check to see that the straps are tight enough to prevent the unit and attachment piece from moving around.
2) Make sure that the hook ring is fully attached through its 360 degree circumference.

GymValet Attachment and Removal Tips
When removing the hook ring, place your thumb over the top of the ring and grasp the lower part of the hook with the rest of your hand. Slowly remove the hook by lifting from the bottom; move the hook slightly up and away from the cup/holder. The ring should pop off.

Make sure the cup is firmly connected to the attachment piece. When installing or replacing the GymValet cup you should hear a "Click" when the gear teeth of the cup and the attachment piece match up.

Periodic GymValet maintenance and repositioning
On a somewhat regular basis, give the GymValet a once-over:
• Check to see that the straps are tight enough to prevent the unit and attachment piece from moving around.
• Is the hook ring fully attached through its 360 degree circumference?
• Is the GymValet and the hook ring positioned to offer optimum access to your exercisers? If not, remove and reposition.

Tip: When removing the hook ring, place your thumb over the top of the ring and grasp the lower part of the hook with the rest of your hand. Slowly remove the hook ring by moving the hook up and away from the cup/holder. The ring should pop off.

Make sure the cup/holder is FIRMLY connected/attached to the attachment piece. When installing or replacing the GymValet you would hear a "click" when the gear teeth of the holder and attachment piece match up.

 
Ongoing Maintenance Tips

     
GymValet Home